Thursday, 19 December 2013
P1 PRODUCTION MEETING
Date: Thursday 19th December
Time: 11.50am
Present: Dana & me (Charlotte)
Reasons - complete work discuss nectar steps within shooting and correcting 6+ new images.
Things to improve - using and checking the images after taking each time to see if they're in line with the "rule of thirds gird"
Change the apature of the lense for the close up shots which have a natural background (focus on face)
To create a good balance in the photos be sure to use the tripod.
Try and get minimal scaffolding in the pictures if possible.
Out come of this meeting has been good, as we've agreed on the images that we are going to recreate using better equipment and compositional features.
Wednesday, 18 December 2013
P1 ROTOSCOPING
To trace recorded live-action clips, they are projected onto a 'frosted glass panel' and then the animator traces and regenerates what they are seeing in front of them on the frames themselves.
The same work can now be done with digital images and special computer software. Rotoscoping is frequently used as a technique for combining mainly cartoon figures with realistic settings in television commercials and is also used for special effects in feature-length films.
The projection that projects the images on the panels is called a 'Rotoscope'.
Define Rotoscoping 'transfer (an image from live action film) into another film sequence using a rotoscope'
Disney studios had used the technique of rotoscoping which was used to film scenes with real actors and sets. These scenes were then drawn and were then used as references for the Disney animators to help them visualize the scenes, postures and movements to draw. It comes across in a lot of the older films by Disney all contain it.
P1. ANALYSING CINEMATOGRAPHY
There's not many compositional features in this, due to the fact that it's highly out of focus and there's a lot of noise in the background and distractions.
 This image shows features of composition but are bad due to the scaffolding and cars in the background, the rule of thirds applies but there's a middle focal point, and we are draw to more things around other then Adam running.
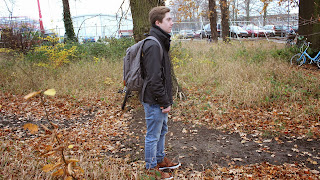 Yet again this images comes across as it it would be okay but if we look careful it's the cars among the background and it's nearly a middle focused image. And the bike wheel distracts.
All in all this image is horrific due to being out of focus, having to much going on in the back ground and has nothing good to it.
The problems in this picture are that you can slightly see a building in the background and (i) Charlotte am facing the camera. Another is the ongoing scaffolding in each image. This may need to have a different location.
 This would've been a great image if the background didn't contain both houses and traffic lights.
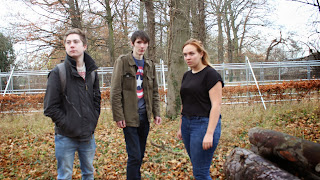
Relatively Good Images.
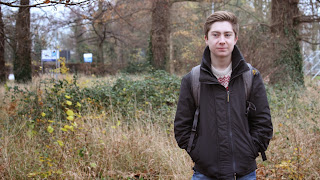
 I think that this image out of all images would be on of the best that we've taken but still has some problems. the good things about this are that theres' a strong sense of emotion in the images and we're able to get a sense for where they're all looking. And also the posture and angle of the characters divides up the picture, but also the tree behind give a good background.
This image is good because it contains a strong rule of thirds and there's a mild focal point which is slightly blurring out the background drawing us in more to Adam and we're able to see him well.
This image is good because there's a depth of field and the background is natural and we're able to get a drift of what is going on as the space is being filled.
Cropping could happen here.
This image i think is good due to the fact that it shows a lot of the setting for the running space. But mainly because the image is well set and there's a rule of third contained. And also contains a wide shot composition
 This image shows features of composition but are bad due to the scaffolding and cars in the background, the rule of thirds applies but there's a middle focal point, and we are draw to more things around other then Adam running.
 Yet again this images comes across as it it would be okay but if we look careful it's the cars among the background and it's nearly a middle focused image. And the bike wheel distracts.
All in all this image is horrific due to being out of focus, having to much going on in the back ground and has nothing good to it.
The problems in this picture are that you can slightly see a building in the background and (i) Charlotte am facing the camera. Another is the ongoing scaffolding in each image. This may need to have a different location.
 This would've been a great image if the background didn't contain both houses and traffic lights.
Relatively Good Images.

 I think that this image out of all images would be on of the best that we've taken but still has some problems. the good things about this are that theres' a strong sense of emotion in the images and we're able to get a sense for where they're all looking. And also the posture and angle of the characters divides up the picture, but also the tree behind give a good background.
This image is good because it contains a strong rule of thirds and there's a mild focal point which is slightly blurring out the background drawing us in more to Adam and we're able to see him well.
This image is good because there's a depth of field and the background is natural and we're able to get a drift of what is going on as the space is being filled.
Cropping could happen here.
This image i think is good due to the fact that it shows a lot of the setting for the running space. But mainly because the image is well set and there's a rule of third contained. And also contains a wide shot composition
This image is good because it shows a strong use of the rule of thirds and is balanced out by the trees giving it a good background feature. The problem with this would be the buildings, cars and scaffolding.
Tuesday, 17 December 2013
P1 CHARACTER BIOS
Born: 1996
Parents: Rich parents, always working.
Born(Place):Cambridgeshire, fen-lands.
Hobbies: Horror films,skating, sports.
Friends: New to the college, not used to new people.
Looks: medium brown hair, Essex style, muscular.
Major moments: Parents pressurize him into learning new powers. Used to hang around with the wrong crowd. Self inflicted behavior.
Jay's goal is to become popular again in the new crowd. He has discovered his power to make things come alive from dreams and fantasy and uses it to do so with a girl he meets.
Name: Alexia Jones
Name: Jay's Mum (Mrs Wattson)
Name: Joey C langer
Born: 1996
Parents: fostered.
Born(Place):New-market stud.
Hobbies: dance, sports
Friends: half the college/
Looks:long blonde hair, blue eyes, tall and skinny.
Major moments: neglected and left by both parents, younger brother separated. Like using telekinesis.
She doesn't really contain a goal, but end up become good friends with Jay and helping him with bullies.
She doesn't really contain a goal, but end up become good friends with Jay and helping him with bullies.
Born: 1974
Born(Place):Chelsea, London
Hobbies: Fashion and publishing.
Looks:Tall slim, model like. Blonde and pale.
Major moments: had an affair with her boss. Feels sorry for the stress on Jay.
Born: 1998
Parents: Rich parents.
Born(Place):Cambridgeshire, fen-lands.
Hobbies: Smoking, football, girls.
Friends: The jocks (football team)
Looks: medium brown hair, muscular.
Major moments:Main school jock, fail football team.
P1 WORKING BETWEEN PREMIER PRO AND AFTER EFFECTS
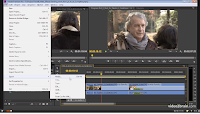
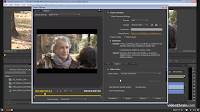 There are so many way in which we can do editing and film making in nowadays using great software made for the given world. Two of which are called Adobe After Effects & Adobe Premier Pro (a bit like final cut) and how we are able to work between the two programs.
As some people may know in PremierePro there are several ways in which we're able to export and import our work.
One of these would be by going to our most likely daily use of the FILE drop down bar. But in Premiere to export you go to: FILE > IMPORT > MEDIA >EXPORT SETTINGS (and then selecting which you want depending on the format you need) For example, most commonly QuickTime settings would come mainly under the PNG selection if you're exporting a large file. Also it gives out a much better quality.
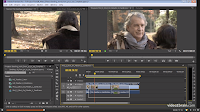 Another way in which we can do this would be something called Lassoing, this is where we're able to select all of our clips the we want and simple right click to chose the option to replace them with an After Effect composition.
After effect should then open and automatically save this for you in any folder you select.
Once you've done this all you need to do is open the file to see that the composition you want has already been created nice and quick!
Also if you're someone who likes to go back to old clips all you need to do is go back into Premier Pro and duplicate the clips other then saving the original copy, or you may need to start over again.
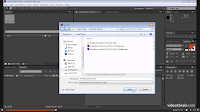
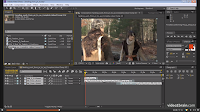
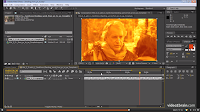
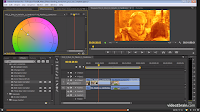
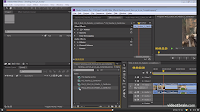 Also with both the programs there are many ways of adding effects into your clips.
If you prefer working on After Effects but your footage is in Premier all you simply need to do is drag your sequence into AE. But remember to make it into a composition.
And a great feature of this is that you can get similar presets on both programs so if you've added effects they should be there on each.
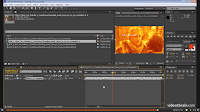
Another key point while doing this will be to SAVE as often as you can! So you don't lose any Effects you've added into to composition.
Then its the simple cause of choosing which you want to add in either program, so save it in both because you can get different effects and similar ones.
P1 PHOTOANAMATIC
Monday, 16 December 2013
XMEN Sound Timeline analysis.
The following image of the above show the different sounds of which were placed into the clip of Xmen we watched. The timeline shows where they come in via colour key. i think that all of the sounds fitted in rather well to each other and were placed well due to the fact that if we have a voice over and dialogue at the same time this would be a mess, but as you can see while theres dialogue theres always music in the background which gives it a more film like atmosphere.
Sunday, 15 December 2013
P1. Research and understanding mattes and matte painting
Definition of Matte: is something of which is use in both film making and photography, this is where you combine two images or more to create a final piece.
This is normally used when people want to combine both the foreground and background images together. In filmmaking matte is a very well known effect, examples of this would be objects of which are wanted to be seen flying, they do this by gathering two sets of footage and one is of which will be the person standing there then jumps. The second would be just the background as an empty shot.
It allows them to create the illusion of an environment that doesn't exist in real life. MATTE IS NOT REAL.
The History of Matte Painting
In the mid-1980s, new technology allowed matte painters to work in the digital industry. The first-ever digital matte shot was created by painter Chris Evans in 1985 for Young Sherlock Holmes in a scene featuring a CGI knight leaping from a stained-glass window. Evans first painted the window in acrylics, this was then scanned the painting into Lucas Film’s Pixar system for further digital manipulation. The computer animation blended with the digital matte. This matte painting stuff involved doing things such as blending scanned images with digital images to generate a scene in which was realistic to the human eye. This was first ever used in star wars a popular program and film of all times arranging across to others such and Planet of the apes and Sherlock Holmes and the wizRd of oz.
This is normally used when people want to combine both the foreground and background images together. In filmmaking matte is a very well known effect, examples of this would be objects of which are wanted to be seen flying, they do this by gathering two sets of footage and one is of which will be the person standing there then jumps. The second would be just the background as an empty shot.
It allows them to create the illusion of an environment that doesn't exist in real life. MATTE IS NOT REAL.
The History of Matte Painting
Friday, 13 December 2013
Thursday, 12 December 2013
Tuesday, 10 December 2013
P1. COSTUME DESIGN - PART TWO
Alisha
Alisha is your everyday teenage girl, but one of which has great self care, pride and passion about herself, and always has to be unique in her own way.
She has a strong pact of feelings towards Blake, and she uses herself, to show of to him, but is very emotional and doesn't like that he won't notice her as a person.
Born: August 96
Aged: 17
Location: Cambridge
Monday, 9 December 2013
P1 RESEARCH AND UNDERSTANDING GREEN SCREEN.
What is a Green Screen?
In his 1898 film Un Homme De Tête Méliès shows a visual trick that comes to be shown as what we nowadays think is part of green screening, the reasons for the are because well " four heads are better then one" clearly! In filmmaking, a time-consuming process called "travelling matte" was used before digital compositing was invented. This is what he used to create Un Homme De Tête.
A Green Screen is something in which many people use nowadays in things from films all the way into tv programs.
Green screens are usual placed in the background in front of things like moving objects, the reason why we do this is so that we can then be allowed to film separately to add in animated effects characters or costumes and backgrounds.
History of the green.
The close of the 19th century with one of the world’s first prolific filmmakers – a man who spent his life studying the art of illusion – Georges Méliès. Shown in the image with the man and the impressive mustache.
In his 1898 film Un Homme De Tête Méliès shows a visual trick that comes to be shown as what we nowadays think is part of green screening, the reasons for the are because well " four heads are better then one" clearly! In filmmaking, a time-consuming process called "travelling matte" was used before digital compositing was invented. This is what he used to create Un Homme De Tête.
The blue/green screen method was developed in the 1930s at RKO Radio Pictures. At RKO, Linwood Dunn used an early version of the travelling matte to create "wipes" - where there were transitions like a windshield wiper in films such as Flying Down to Rio (1993).
One large problem to the traditional travelling matte is that the cameras shooting the images to be composted can't be easily synchronised For decades matte shots had to be done "locked-down"so that neither the matted subject nor the background could shift. Later on computer-timed, motion-control cameras restored this problem, as both the foreground and background could be filmed with the same camera moves.
Green Screen Use from films today.
A strong example to show this would be the latest recreation of Alice in Wonderland. The reasons why I say this is because if you watch the film carefully, it's fully costumed and has a lot of animation included in a lot of it, and backgrounds that look near enough impossible. So within this the green screen usage makes the whole thing more advanced and believable to date, the
live-action sequences involving Alice in the real world that bookend the film were shot on location in Cornwall in England, all the scenes that take place in Underland itself were shot on green-screen stages at Culver City Studios in Los Angeles, with all its environs created entirely digitally in post-production.
P1 Visual Effect Research
Visual effects: Lighting strikes.
Visual effects: Demon eyes.
Visual effects: Flying/Drag up.
Wednesday, 4 December 2013
P1. LOCATION RECCE - IMAGE LOCATIONS
These two images show, the entrance up to the woods and the path once we enter. As you can see there are many obstructions which may occur due to people walking through and the bikes parked up against following trees.
This panoramic above, ables us to see that the area is surrounded via scaffold fencing, we will have to be aware of this when we do our running scene.
This panoramic above, ables us to see that the area is surrounded via scaffold fencing, we will have to be aware of this when we do our running scene.
This is the sidewalk which we will have to be very aware of when we do our running sequence due to the verge being very hidden and unnoticeable.
Traffic lights and the road could make many possible problems of cars and background noise.
Tuesday, 3 December 2013
Subscribe to:
Comments (Atom)


.jpg)


