The following information shows screen captures and steps of how i did the lightning footage scene for my projects rough cut.

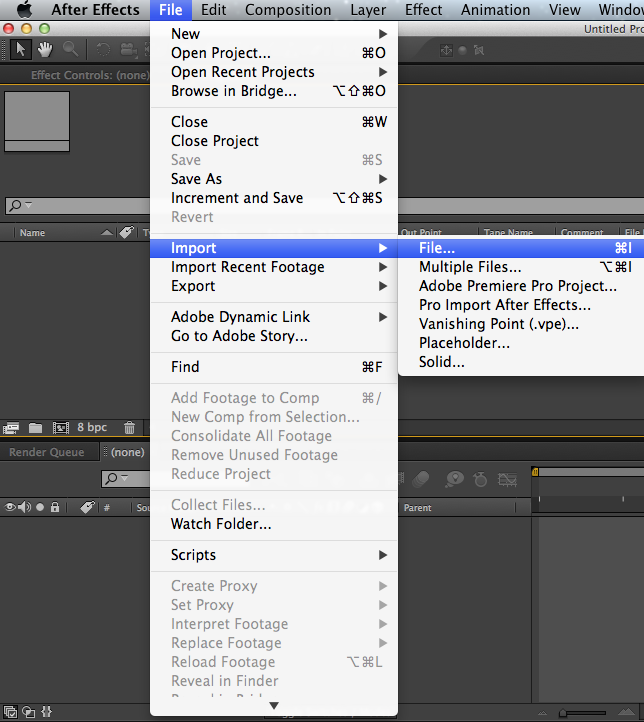
Open up Adobe After Effects, and go to file > import > file.
Once i was into my documents I went through my files to get to the clip of which i wanted to import.
Once i found my file i the opened it up into AE.
Once opened in AE, I dragged the MOV down to the little icon which looks like a filmstrip, this is what makes it into a composition e.g easier to edit the clip. This then changes the workspace below to show you what formats you have available, in my case the MOV and the Composition.

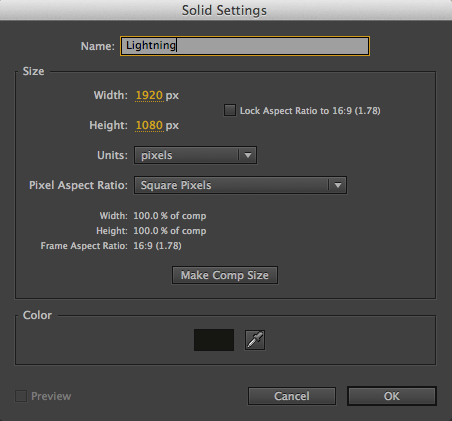
I dragged the composition down into another workspace. BUT because i want to do an effect, i need to create a layer which is compatible to what i need, so i opened up a new solid layer and named it to which i wanted "Lightning"
Once i'd done this in my workspace the screen changed to a black colour and a new layer in the timeline was created amongst the top of the clip.
Show in blue and red.
Now the important part, finding a preset for the lightning.
The one i used was the advanced lightning because it gave more of a drastic feel and colour to my scene.
After double clicking on Advanced Lightning, you'll see that the workspace changes and the Bolt appears. When you've done this you're then further able to change the movement and can also add in effects over the top and even more layers to give more Bolts depending on how many you want and the atmosphere you're wanting to create.
I was after a really life self explained moody heartless scene where i decided that i would input more layers as which can be seen in the evidence photos.

To change how the lightning was placed and so it moved i used the keyframes to help with this, and also i used something in the effect controls that ables me to change the directions and the forking of the lightning to suit my work.


